Labels

Saturday, October 29, 2011

A Sleepy Hollow Affair!

 On Friday, we celebrated our annual Halloween dinner with friends.  Our theme was Washington Irving's "Sleepy Hollow", which as you may remember from Literature class, is set in Colonial times, and is the story of the Headless Horseman, who traumatizes Ichabod Crane in a cemetery!
My in-laws asked if I wanted this scarecrow and I jumped at the chance.  I already had a plan for it........

This!!!  I wanted it for a sign-stand.  I stripped off the arms and hair and painted it white so I could use it year round for holiday signs and decoration.  This was appropriately placed on the back porch and pointed to the home made cemetery shown below!


This headstone was made of cardboard.  The epitaph was printed out and hand cut before being taped to the front.

This stone was the remains of a foam surf-board used a few years back for our Outrigger Island VBS.  Cayla insisted one of the stones read, "RIP".
The theme wouldn't be complete without paying tribute to Ichabod  Crane, the smarmy school master.

Toilet paper rolls, covered in scrapbook paper, decoupaged.....
....filled with chocolates.....

....and wrapped like large pieces of candy, made great party favors for the kids.

What a trooper.  Not only did he keep the bandana on, he willingly posed for the picture.
I love these blocks.  My in-laws gave them to the girls, but I think I've had more fun with them.

Candy and decorations.....

....More decor, plus cupcakes the girls decorated by themselves.

Pictures printed from the internet provided theme-appropriate decoration.

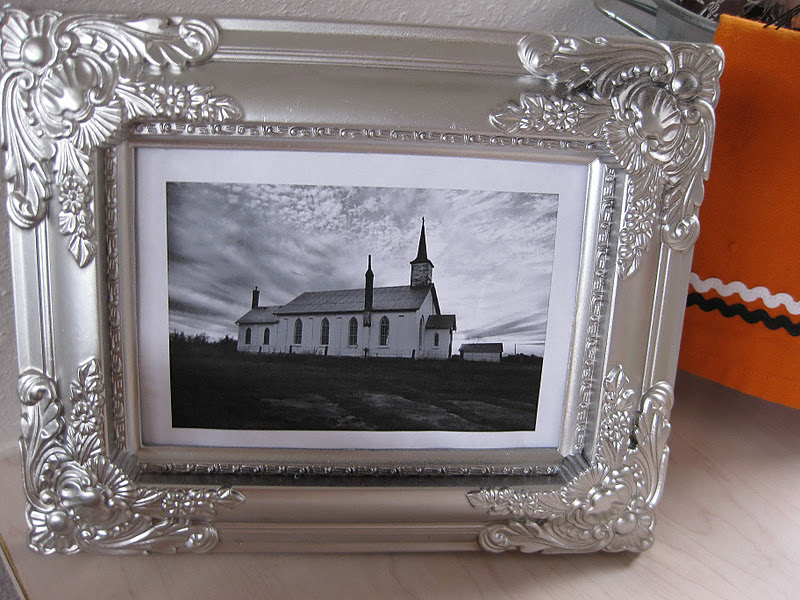
Love this photo of a church.  Choosing to print them in black and white made them more eerie.

Black and white cemetery photograph, greeted guests who entered through the side door.

Potion bottles purchased for $.49 each at a thrift store.  I found labels on the internet and printed them off.

Candelabra and pumpkin centerpiece.

A tree branch from our cherry blossom tree out back.  When Cory pruned this fall, he saved it for me.  We suspended it from the ceiling, over the table, wrapped it in lights and draped faux spider webs across it for a macabre effect.

Brighter photo of the branch.  The pictures don't do it justice; it was really pretty cool!

Window sill decorated to welcome back door guests.
Wilton bottle labels, purchased at JoAnn dressed up our Martinelli's and sparkling lemonade perfectly.
My guests brought the cutest hostess gifts.  They know me too well.  My love of candy corn......


.....and pumpkins.

Monday, October 24, 2011

Halloween Party Prep Work!

In preparation for my yearly Halloween party, I settled on a cute idea to dress up some candy that was a bit lackluster.  I also made some place cards for my guests.  Read on.....

Hershey's Kisses with meltaway centers are delicious.  They also come nicely wrapped in Halloween appropriate orange (with silver) foil.  (For some reason I can't find the kisses wrapped in solid orange and black foil.  Are they still making them?)  To dress them up I asked Autumn to put a Halloween sticker on the bottom of each one.  The stickers were $1 at the Target dollar spot and I bought them a while ago, unsure at the time what I would do with them.  Now I know :)

The green 'EEK' bowl is courtesy of my sister.  It was the perfect dish to hold all my decked out kisses.  So simple, yet really festive!
Next I made place cards for the guests (but only photographed two of them).  Using paint swatches from the paint counter, I cut the tops and bottoms with embellished scissors and wrote the name of each guest on the front.  Then, I punched out the perforated hole at the bottom and pushed a Hershey's Kiss through.  The kiss is just the right height to act as a stand and hold up the card.  I thought they were pretty cute.....until I saw the photo on my computer screen.  Ugh!  They were boring and needed something else.

Tada!!!!  The women's cards perked up with the addition of a black gross grain bow, and the men's cards received little designs using an orange, glitter glue pen.  Whew!  Two projects down......

Saturday, October 22, 2011

Halloween Scarf!

On Friday night I wanted to de-stress so I opted to make a scarf.  I bought a couple yards of this orange and black fabric over a month ago and have been putting off making this, but tonight was the night.  No tutorial, just a few pics.
I love this Halloween themed jersey knit.  And although it's super thin and lightweight, once I stitched the two panels together it made it sufficiently weighty.  I think it's going to be quite warm :)

Most people put on make-up and do their hair for pictures.  But this is what you get when you sew at 11:00 at night!

Typically skulls aren't my thing, but they definitely work for Halloween!!! 

Tuesday, October 18, 2011

Simple & Sweet!

On Sunday, we celebrated this amazing autumn weather by barbecuing hot dogs and making smores in the fire pit on our back porch.  The temperature was just right for wearing a favorite sweatshirt, or donning blankets as the girls did here.  Since I'm always touting the simple things in life, I couldn't let this evening go by unreported:

Three of my favorite people!

Smores!  I like them best withOUT the marshmallows or graham crackers :)

Cayla enjoying hot chocolate in the cool air!

Autumn, wrapped in her blanket and sipping cocoa, cozied up next to me on the swing.

This picture makes me laugh.  Look at those ears.  He was soooooo fascinated by the pieces of ash that floated in front of his face.  He kept trying to bite at them.  It was hilarious!

Autumn and me on the swing, staying warm together!

He got some hotdog, graham crackers and marshmallows as his post-dinner treat :)

Cayla prefers to be the photographer instead of the subject!

Happy autumn everybody!!!!

Saturday, October 8, 2011

Ruffles!

Here's my first ruffled tote.  Read on to see some of the steps involved in making it.
After seeing numerous ruffles and ruffled items from curtains, to skirts to bags on the internet, I was determined to create a ruffle project of my own.  With my insane bag obsession, I figured that would be the best place to start.  Here's a quasi-tutorial, but be forewarned, when it comes to crafting/sewing I don't use patterns or measurements, I just jump in with both feet, go for broke and learn from my mistakes.  So...... 
I started by selecting some fabrics to use for ruffles.  I wanted a fall/autumn bag that I could carry from September through Thanksgiving, so I chose hues in brown, tan and orange.  How much fabric did I use to make the strips?  I have no clue.  I just started cutting strips :)

I created a small hem down one side of my fabric and then began a basting stitch roughly down the center of the piece.

A basting stitch is a loose and wide stitch with thread leads on both ends and no back stitching.  See the thread under my thumb?  That's the bottom thread that I pulled on with my left hand while pushing the fabric  to the right with my right hand.

Once the fabric is gathered, it looks like this.  When I was pleased with how ruffly my fabric was, I tied off both ends so it wouldn't unravel.  Because I didn't use a super long piece of fabric I ended up with a shorter ruffle, widely spaced.  For a tight ruffle I would have needed a piece of fabric probably twice as long.  But this was trial and error so I worked with what I had.

Here are all three fabric pieces ruffled and ready to attach to my bag.

I had some oatmeal colored duck cloth (basically it's a light weight canvas) that looks white in this picture, but it's not, it's cream, that I knew would make a cute bag.  I cut my duck fabric just a little wider than my ruffles and started stitching them together, beginning by pinning my ruffle onto the canvas.

The orange fabric was my first ruffle and I'm wondering if I should have started with the bottom ruffle first, but since I didn't, I had to get the top ruffle out of the way so I could attach the second ruffle, so I just pinned the top one out of the way.  I then pinned my second ruffle on and stitched it into place.  I continued until all three ruffles were attached.

Here's the back of the canvas bag with the top edge ironed and pinned, awaiting the handles before sewing. 

Handles are fun because they're sooo easy.  I cut two, even lengths of canvas, folded the edges together, ironed them down, pinned them and sewed all the way around to create a nice, even top stitch.

In case you're thinking, "I thought she was done with ruffles, this photo must be out of place," let me assure you, since it was a work in progress, I analyzed it with the three ruffles and decided it needed a fourth one. So here is the photo of the other three ruffles pinned out of the way and a fourth ruffle being added.

Once the ruffles were finished, I attached the handles (yep, by eye balling them instead of measuring like I probably should have :) turned the bag inside out and double-stitched the side seams, then turned it right side out and voila!  My first ruffled project.  What do you think?

Check out the links below to find my project and inspiration for much more: