Labels

Wednesday, November 23, 2011

Truffles Revisited!

Remember this?
Last Christmas, you may remember I made the most wonderful Oreo truffles (if I do say so myself).  My kids loved them and it was so simple I figured it was time to revisit the recipe and make them for one of our kid-friendly Thanksgiving desserts.  You can find the original post here and I've included the recipe below if you want to try them.  One more thing, the recipe calls for almond bark to dip the truffles in and I opted once again, to use CandiQuik.  As I said originally, it's more expensive but it's SO worth the price.  CandiQuik heats nice and evenly and can be reheated over and over, whereas I've found almond bark is not that easy to work with.  Almond bark can only be heated once and after that it hardens while heating, and then scorches.  Just my opinion!

Oreo truffles, dipped in CandiQuik, with harvest sprinkles!

Oreo truffles, dipped in CandiQuik and drizzled in orange frosting with autumn nonpareils.   (I wasn't as fond of the orange frosted truffles, but Autumn loved them and since she helped me decorate, I let her go for it. )

Easy Oreo Truffles

1 - 16.6 oz. (standard size) package Oreos
1 - 8 oz. package cream cheese
1 - 16 oz. package CandiQuik vanilla (or chocolate if you prefer) coating
Nonpareils, icing, crushed Oreos or other 'toppings/decorations' of your choice

Directions:  Crush Oreos (I used my blender and it was awesome, but you can use whatever method suits you.  I hear a plastic bag with a rolling pin works.)
In mixing bowl, combine crushed Oreos with cream cheese.  Mix together thoroughly.  Shape into balls and place on a cookie sheet covered with wax paper.  Put truffles into refrigerator (or freezer) to chill.  I left mine for over an hour.
In a separate bowl, heat half the blocks of CandiQuik (if you heat it all at once it will ALL get Oreo chunks in it and turn 'dirty'.) and, using a fork dip the truffles into the CandiQuik, coating thoroughly.  Set aside in mini cupcake liners or on wax paper.  Immediately sprinkle on nonpareils or other decorations and set aside to harden.

That's it!  Super easy, super fun, super quick and super delicious!

Happy Thanksgiving!

Monday, November 14, 2011

Pinterest Accomplishment!

 This evening I finally made a couple of the items I had pinned on Pinterest.  The first one was a treat for Chuck.  These peanut butter dog bones were a snap to make.  I found a dog bone shaped cookie cutter at JoAnn Fabrics and knew I had to try making some treats.  They're made with human grade ingredients so I decided to taste one.  They're awful......because they have no sugar. Chuck however, LOVED them.  The recipe is below (with my notes in red) if you want to make some for your furry friend.

Peanut Butter Dog Treats

Ingredients:
2 cups whole-wheat flour
1 Tablespoon baking powder
1 cup natural peanut butter (really? my dog thought the Great Value brand was just fine)
1 cup non-fat milk (I only had 2% and it was perfect - just ask Chuck)

Preheat oven to 375 degrees.  In a bowl, combine all ingredients and mix well.
Turn out dough on a lightly floured surface and knead. Roll out to 1/4-inch thickness and cut out shapes. Place on a greased baking sheet and bake 20 minutes or until lightly brown. Cool on a rack and store in an airtight container.

Next, I made dinner for the family.  With human grade ingredients - just in case you were wondering :)  This baked spaghetti was E-A-S-Y and you know if I'm saying it's easy it really IS easy.  The family loved it and fortunately, I decided in advance not to use a 9x13 dish, but instead, to divide it between two 8x8 dishes. I put one of the dishes in the freezer and we'll save that one for another night.  Cook once, eat twice - YES! Bonus!!!


I've made baked spaghetti many times before and we always thought it was decent, but this recipe contains the magic ingredient.........cream cheese.  It really improved the flavor, making it creamier, and it helps the spaghetti to stick together so after it's baked it cuts apart in nice, tidy little squares.  You know I like tidy!!!  I used the following recipe - my revisions are in red :)  ENJOY!!!

Baked Cream Cheese Spaghetti Casserole

Adapted from Food.com and salad-in-a-jar.com

12 oz spaghetti (I used 16 oz.)
1 (28 ounce) jars prepared spaghetti sauce
1 lb lean ground beef
1 tsp Italian seasoning
1 clove garlic, minced (I left this out)
8 ounces cream cheese
1/2 cup parmesan cheese, grated (It was pre-grated, in the little green can :)

Preheat oven to 350 F degrees.

In a skillet, brown the ground beef until cooked through; drain fat and stir in spaghetti sauce.  Set aside.

Cook spaghetti according to directions on packet.  Drain and place cooked spaghetti in bowl.  Add cream cheese, Italian Seasoning and minced garlic.  Stir until cream cheese is melted and the spaghetti is thoroughly coated. 

Lightly grease a 9x13" pan.  Spread a small amount of meat sauce in the bottom of the dish.  Put spaghetti on top of sauce and top with remaining meat sauce.  Sprinkle parmesan cheese on top.

Bake for 30 minutes, until bubbly.
----------
So that's it!  Dinner for us, treats for Chuck and the feeling of accomplishment for having actually used one of my Pinterest pins!!!

Saturday, November 12, 2011

Be Thankful!

It's the season for giving thanks, and what better way than with a list.  Because you all know how much I LOVE a list?!  So, here are 10 things I'm thankful for.  They're a tad out of the norm, but I figured family and friends go without saying.......I hope you'll play along and add your list in the comments section......

1)  Pinterest - Pinterest is a list-lovers dream only better, because it's pictures.
2)  Sweet Potato Casserole - It's the only sweet potato dish I really like and it's my sister's recipe so you know it's incredible.  If you've ever had Thanksgiving with us, you've had it.  And if you didn't try it, you only cheated yourself because it's amazing!!!
3)  Spray Paint - I've gone a little crazy lately painting everything in sight, or planning to anyhow.  For just a few bucks, spray paint turns trash into treasure.  LOVE!
4)  Lists - Whether they're on my phone, my Mac, or just a slip of paper, I'd be a disorganized mess without my lists.  Lists are essential.  And obviously the people at 3M think so too.....have you checked the price of "Post-It's" lately?
5)  Mason Jars - They're not just for canning anymore Toto!  I store everything from spools of thread to decorated clothes pins in mine.
6)  Organization - Admittedly, I'm not always on top of it, but I'm still thankful for it.  When I see rooms, cabinets, items, stores, anything completely organized, it gives me this wonderful, warm feeling.
7)  Discounts - Because retail is sooooo overrated!
8)  Blizzards - No, not the kind that shuts down streets and knocks out power.  The ice cream kind.  And as a member of the Blizzard Fan Club, I get 6 "buy one get one" coupons a year.  It's a family fave :)
9)  Humor - I'm grateful to God for giving us a sense of humor.  Afterall, who doesn't love to laugh so hard they have tears in their eyes?!
10) Tooth brushes - Yep!  I said it.  I'm thankful for tooth brushes.  Admit it, you are too.  As a child, I loved getting a new one from the dentist, and today, as an obsessive teeth brusher, I still love cracking open the package on a colorful, perfect-bristled brush.

Just so you know, this isn't just some list I randomly threw together.  I genuinely, at one time or another, have pondered the things above and thought, "Man, I'm thankful for this."  And I've thought it more than once about Post-It notes :)

Happy Thanksgiving!  Be Thankful!!!

Saturday, October 29, 2011

A Sleepy Hollow Affair!

 On Friday, we celebrated our annual Halloween dinner with friends.  Our theme was Washington Irving's "Sleepy Hollow", which as you may remember from Literature class, is set in Colonial times, and is the story of the Headless Horseman, who traumatizes Ichabod Crane in a cemetery!
My in-laws asked if I wanted this scarecrow and I jumped at the chance.  I already had a plan for it........

This!!!  I wanted it for a sign-stand.  I stripped off the arms and hair and painted it white so I could use it year round for holiday signs and decoration.  This was appropriately placed on the back porch and pointed to the home made cemetery shown below!


This headstone was made of cardboard.  The epitaph was printed out and hand cut before being taped to the front.

This stone was the remains of a foam surf-board used a few years back for our Outrigger Island VBS.  Cayla insisted one of the stones read, "RIP".
The theme wouldn't be complete without paying tribute to Ichabod  Crane, the smarmy school master.

Toilet paper rolls, covered in scrapbook paper, decoupaged.....
....filled with chocolates.....

....and wrapped like large pieces of candy, made great party favors for the kids.

What a trooper.  Not only did he keep the bandana on, he willingly posed for the picture.
I love these blocks.  My in-laws gave them to the girls, but I think I've had more fun with them.

Candy and decorations.....

....More decor, plus cupcakes the girls decorated by themselves.

Pictures printed from the internet provided theme-appropriate decoration.

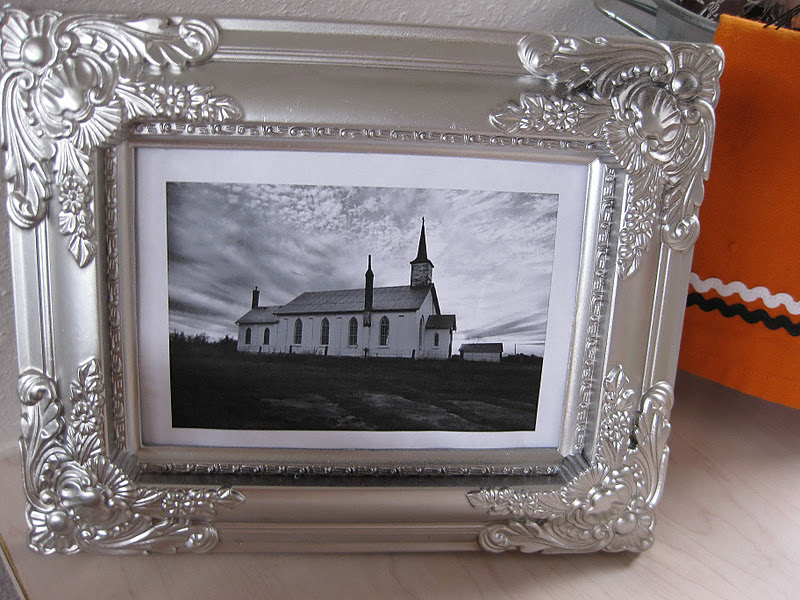
Love this photo of a church.  Choosing to print them in black and white made them more eerie.

Black and white cemetery photograph, greeted guests who entered through the side door.

Potion bottles purchased for $.49 each at a thrift store.  I found labels on the internet and printed them off.

Candelabra and pumpkin centerpiece.

A tree branch from our cherry blossom tree out back.  When Cory pruned this fall, he saved it for me.  We suspended it from the ceiling, over the table, wrapped it in lights and draped faux spider webs across it for a macabre effect.

Brighter photo of the branch.  The pictures don't do it justice; it was really pretty cool!

Window sill decorated to welcome back door guests.
Wilton bottle labels, purchased at JoAnn dressed up our Martinelli's and sparkling lemonade perfectly.
My guests brought the cutest hostess gifts.  They know me too well.  My love of candy corn......


.....and pumpkins.

Monday, October 24, 2011

Halloween Party Prep Work!

In preparation for my yearly Halloween party, I settled on a cute idea to dress up some candy that was a bit lackluster.  I also made some place cards for my guests.  Read on.....

Hershey's Kisses with meltaway centers are delicious.  They also come nicely wrapped in Halloween appropriate orange (with silver) foil.  (For some reason I can't find the kisses wrapped in solid orange and black foil.  Are they still making them?)  To dress them up I asked Autumn to put a Halloween sticker on the bottom of each one.  The stickers were $1 at the Target dollar spot and I bought them a while ago, unsure at the time what I would do with them.  Now I know :)

The green 'EEK' bowl is courtesy of my sister.  It was the perfect dish to hold all my decked out kisses.  So simple, yet really festive!
Next I made place cards for the guests (but only photographed two of them).  Using paint swatches from the paint counter, I cut the tops and bottoms with embellished scissors and wrote the name of each guest on the front.  Then, I punched out the perforated hole at the bottom and pushed a Hershey's Kiss through.  The kiss is just the right height to act as a stand and hold up the card.  I thought they were pretty cute.....until I saw the photo on my computer screen.  Ugh!  They were boring and needed something else.

Tada!!!!  The women's cards perked up with the addition of a black gross grain bow, and the men's cards received little designs using an orange, glitter glue pen.  Whew!  Two projects down......

Saturday, October 22, 2011

Halloween Scarf!

On Friday night I wanted to de-stress so I opted to make a scarf.  I bought a couple yards of this orange and black fabric over a month ago and have been putting off making this, but tonight was the night.  No tutorial, just a few pics.
I love this Halloween themed jersey knit.  And although it's super thin and lightweight, once I stitched the two panels together it made it sufficiently weighty.  I think it's going to be quite warm :)

Most people put on make-up and do their hair for pictures.  But this is what you get when you sew at 11:00 at night!

Typically skulls aren't my thing, but they definitely work for Halloween!!! 

Tuesday, October 18, 2011

Simple & Sweet!

On Sunday, we celebrated this amazing autumn weather by barbecuing hot dogs and making smores in the fire pit on our back porch.  The temperature was just right for wearing a favorite sweatshirt, or donning blankets as the girls did here.  Since I'm always touting the simple things in life, I couldn't let this evening go by unreported:

Three of my favorite people!

Smores!  I like them best withOUT the marshmallows or graham crackers :)

Cayla enjoying hot chocolate in the cool air!

Autumn, wrapped in her blanket and sipping cocoa, cozied up next to me on the swing.

This picture makes me laugh.  Look at those ears.  He was soooooo fascinated by the pieces of ash that floated in front of his face.  He kept trying to bite at them.  It was hilarious!

Autumn and me on the swing, staying warm together!

He got some hotdog, graham crackers and marshmallows as his post-dinner treat :)

Cayla prefers to be the photographer instead of the subject!

Happy autumn everybody!!!!